I do live in the middle of a large-ish city in Washington...I was shocked and amazed that I could even own chickens! I wanted them as pets, but they come with the added bonus of providing breakfast (about once a week with the number of eggs we go through)! So, as of today (3/16/2011), we have a small flock of 3 chicks! But, back to their future home!
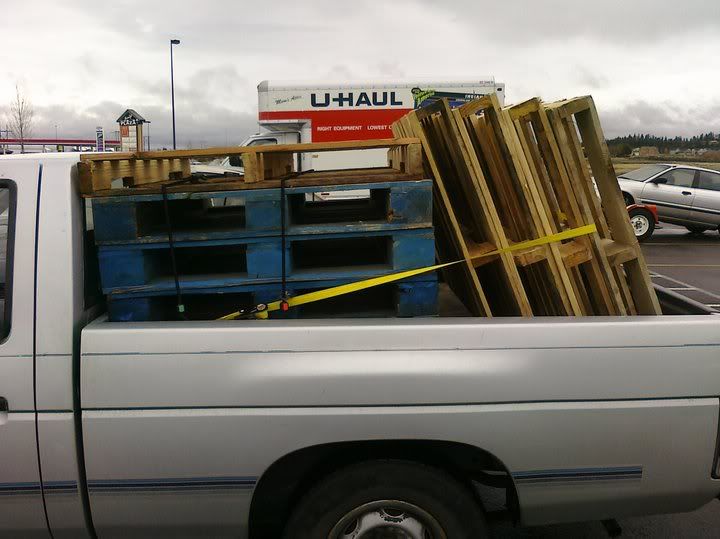
That's what I started with...a truck load of pallets that I got for free off Craig's List! I fit 10 of those monsters in the back of my little pick-up (with help lifting)! I should mention that with 75% of the building done...I still have 7 of those piled in my garage untouched, lol.
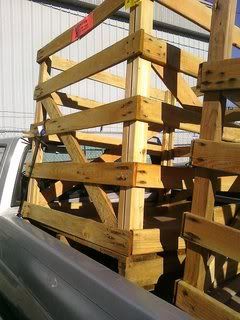
Then, I found these (also free on CL)! Pallet crates! Talk about the majority of the work being done for me! With the tailgate left down, I was able to fit 2 of these in the little pick-up! I did not have help getting these suckers up there...very bad experience at the business I got them from! But, I left the previously seen yellow tie-down at home and had to call my boyfriend's father (who lives close by) to bring me another one. We went a day later and bought our own set of tie-downs that now live in the truck!
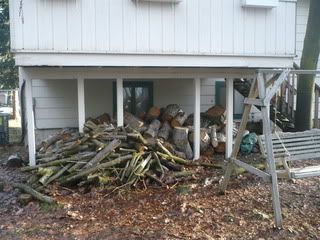
We picked out a spot for the coop and chicken run (fenced in area to keep them safe)...decided on under our back deck! I sold the wood for what I thought was a good deal...(started a savings account with it to save up for a toy for me...a microscope!) and got to raking! About half of the skinny stuff is still there...that'll have to go before we can finish the run!

Got supplies and got to building! Taking advice I got from "seasoned" chicken care takers, I started building up on concrete blocks with 4"x4" treated lumber posts to sit the whole thing on. The floor is 2 of the big blue pallets set next to each other with tongue&groove sub-flooring over them. On top of the T&G, I put 12" square Vinyl tiles to make cleaning the coop a little easier. Then came the wall building! I flipped the pallet crates on end (making the pallet on the base of them the top of the coop) and got rid of the boards running through what would become the coop interior. I'm using a mix of OSB and plywood for thew walls and will paint the whole thing with exterior paint when complete (too cold yet for paint to dry properly). I even managed to get paint that will match our house!
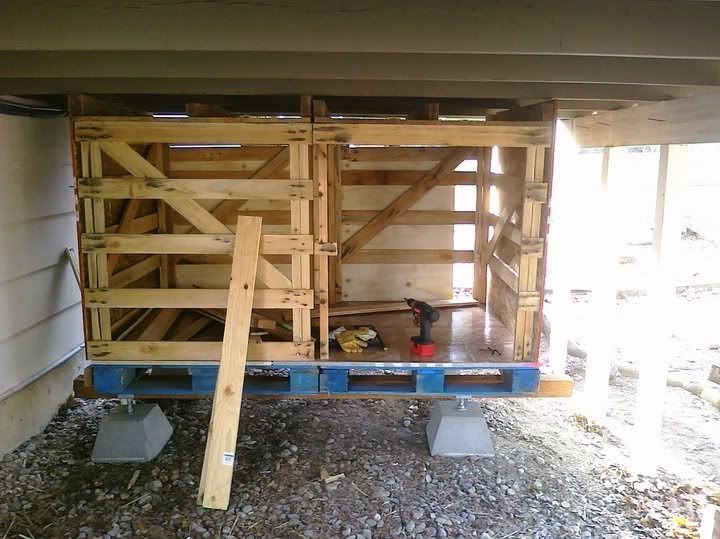
This is how it has sat for almost a month now... We had a turn for the worse in the weather, snow & sub-zero weather, the day after I took this picture! More recently the weather had cooperated, but my schedule and ability to injure myself have gotten the better of me! I did get out today between running around town and everything has held up amazingly! I hope to get out there in the next few days and get that last wall up! It will hold both the chicken sized door and the human sized one so I can clean the coop out.
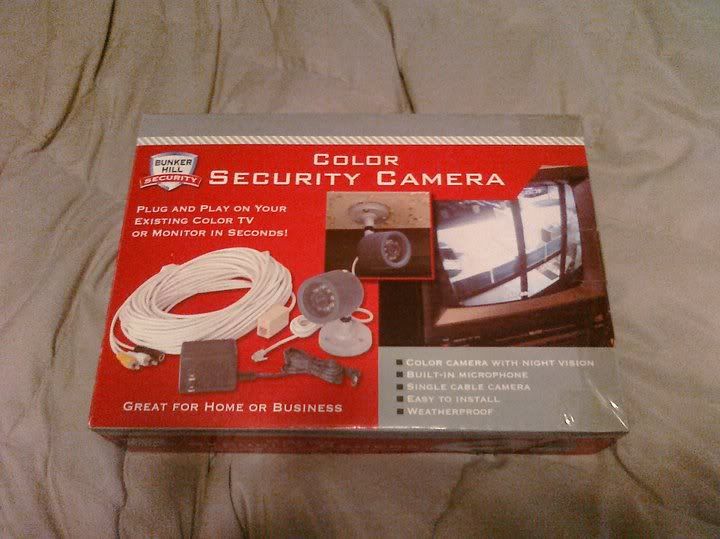
I have collected many a doo-dad for the coop since January when I decided on this idea of mine...but this is by far my favorite! This will be mounted inside the coop so that I can monitor them at night from inside the house! It has color, night vision, and sound! It isn't really high-tech, but I think it's awesome! It was also on sale for $25 when we got it!
No comments:
Post a Comment